The X-Lite softphone allows you to make or receive calls from your computer using your Hosted PBX service. Download X-Lite by clicking here.
- Please Note: X-Lite has presence, instant messaging, and video conferencing features built in. However, these features are not supported.
The instructions below are based on X-Lite version 4.7.
Provision X-Lite
- Log in to your Hosted PBX instance and obtain the extension number and sip password.
- Open the X-Lite softphone. Click Softphone, then Account Settings.

- Click Add, and select SIP Account.
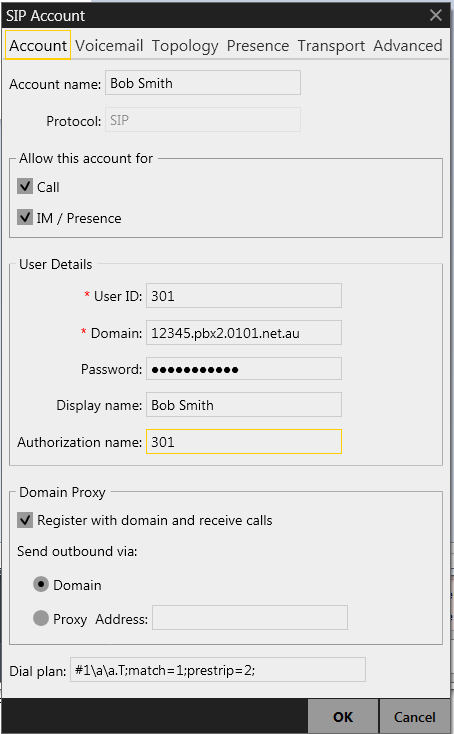
- Fill in the information as shown below for your Hosted PBX extension.Enter the Account Name: Description of the account
Tick “Call” and “IM/Presence”
Enter the User ID: The user’s extension number
Domain: Enter the Hosted PBX instance name.
Password: Enter the extension’s SIP password.
Display Name: This will be displayed on all outgoing calls.
Authorisation Name: The user’s extension number.
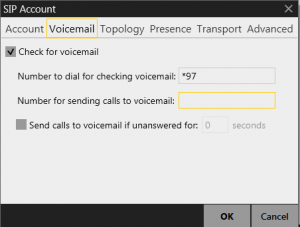
- Click on the Voicemail tab and enter *97 as shown belowNumber to dial for checking voicemail: *97
- Click OK in the bottom right-hand side of the window.
- The softphone should now be registered to your PBX.